Water storage can be a big problem for those with limited space and no well. But there is a way to still prepare for your water needs in the event of a long term emergency. You can use a Do-it-yourself rainwater harvesting system.
There is more than one way to go about creating your own system to have water when the SHTF. Additionally, rainwater harvesting is one of the most self-sufficient and environment-friendly methods of using water. You are collecting water from the sky as it falls, all the while trying to utilize is as much as you can, and without a price tag looming on it.
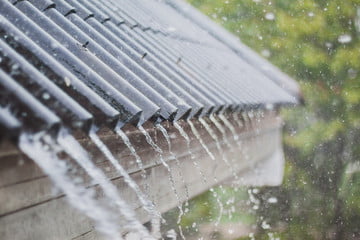
The average roof collects 600 gallons (2,271.2 L) of water for every inch of rainfall and you can make a rainwater collection system for under a hundred dollars and store hundreds of gallons of water to use for your garden or other purposes. Make sure you have a filtration system in place before drinking this water just to be safe.
Please be aware that some states have banned rainwater collection and harvesting.
Installing a simple rain barrel to collect water is pretty easy. Through this do-it-yourself tutorial, you can make it in no time and start harvesting water in just four steps. Connecting a rain barrel system to the rainwater drainage pipes is an efficient way of collecting rainwater. What I also like about this tutorial is the reliance on visuals to explain the process, which is always helpful, especially to those who are new to prepping.
What You’ll Need
Obtain one or more water storage barrels. We suggest a food-grade BPA-free plastic water storage barrel (in case this water needs to be used for human consumption). A rain barrel can also be made from a large plastic trash can if you are on a budget and intend to use the water only in a garden or for washing. You’ll want a barrel that will hold 30 to 55 gallons (113.6 to 208.2 L) of water.

- If you decide to get a used barrel, make sure that it didn’t formerly contain oil, pesticides, or any other type of toxic substance. It’s too difficult to clean these chemicals from the inside of the barrel, so using them is too risky.
- If you plan on collecting a lot of water, get two or three barrels. You’ll be able to connect them so they’re all part of the same water collection system and this way you can have hundreds of gallons of water at your disposal.
- 1 standard 1-inch hose spigot with ¾-in. pipe threads, so you can access water from your rain barrel.
- 1 ¾-inch x ¾-inch coupling
- 1 ¾-inch x ¾-inch bushing
- 1 ¾-inch pipe thread with a 1-inch hose adapter
- 1 ¾-inch lock nut
- 4 metal washers
- 1 roll Teflon thread tape
- 1 tube silicone caulk
- 1 “S”-shaped aluminum downspout elbow, to direct water from your downspout to your rain barrel
- 1 piece of aluminum window screen, to keep leaves, bugs and other materials out of your water
- 4-6 concrete blocks
Once you’ve got the supplies needed, level the area next to your downspout by clearing away any debris. Make sure you’ve cleared an area big enough to fit all the barrels you’d like to use. Put down a layer of pea gravel. This will provide better drainage around the rain barrels and help keep water away from the foundation of your home. Dig a 5-inch deep rectangle in the area you leveled to accommodate the rain barrels, and fill it with 1⁄2 inch (1.3 cm) of pea gravel. If you are putting barrels on concrete, don’t worry about the pea gravel. Stack the concrete blocks on the pea gravel to create a raised platform for your rainwater barrels.
Drill a spigot hole in the side of your barrel. It should be high enough up on the barrel to fit a bucket or water jug underneath. Make a 3/4-inch hole to properly fit the spigot you bought. Use caulk on both the inside and outside of the hole. Put the spigot and the coupling together. Use Teflon tape to wrap the threaded ends to create a tight seal and prevent leakage. Put a washer on the threaded end of the coupling and insert it through the hole in the barrel from the outside. Slip another washer over the pipe from the inside. Attach the bushing to hold the spigot in place.
(For pictures, please click here or watch the video below)
Next, make an overflow valve. Click here for detailed instructions if you are using more than one barrel. Put a filer at the top of the downspout so leaves and debris stay out of your water. Connect the downspout using the “S” elbow to your rain barrels.
This is just a simple way to start collecting rainwater, and there is more than one way to do this. Make it work for you and your situation. Prepping really isn’t a “one size fits all” deal. We all have different setups and needs, so create something that works for you. If something doesn’t work in this guide, scrap it and find what does work. We simply hope this gives you ideas on how to better prepare for an emergency.
Also, if you are new to prepping, don’t worry about trying this! We all started somewhere and as you get more ideas, you’ll be able to discover new and innovative ways to make things work for you in your current situation. Most preppers are here to help and offer advice that’s worked for them personally. If nothing else, you’ll come away with some great ideas on how to advance your preparedness.


0 Comments