This article was originally published by Prepper Aaron at The Simple Prepper.
Having paracord handy when you need it during an emergency situation in the wilderness can literally be a lifesaver. This versatile material, which is the same thin nylon cord used for parachute lines, can tackle any application that would normally call for rope as well as a stand-in for nearly any use you can imagine during an emergency.
While you could carry loose paracord in your pack or survival kit, a better way to keep it easily accessible and somewhere you won’t lose it is to wrap a length of paracord around your wrist as a bracelet. This article will cover the basics of paracord and list seven of the best paracord weaves for making paracord bracelet designs.
Why Use Paracord?
Paracord is extremely durable and adaptable – characteristics that are critical for the tools that you might depend on in a survival situation. Some examples of uses that paracord is perfect for are:
- First aid, for example for making an emergency tourniquet or splint
- Starting a fire with a bow and spindle drill
- Replacing bootlaces
- Carrying equipment
- Creating a makeshift fishing line
- Survival snares and bows for catching game
Essentially, for any problem you might encounter, you can imagine – or someone already has tried – a way that paracord can help to solve the issue.
What to look for in paracord
The most important feature to look for in paracord is the strength of the nylon. Most premium paracord is 550-grade nylon, which is nearly unbreakable even under heavy use conditions. Although 400-grade paracord is also available, it is typically best to stick with 550-grade nylon since you’re planning to use this material in a survival situation and dependability matters.
Where to get paracord
Paracord bracelet supplies can easily be found online as well as in many outdoor and camping stores – its usefulness means that lots of places carry it. If you are planning on turning your loose paracord into a bracelet, you might also be interested in paracord bracelet kits that come complete with just enough paracord to make a bracelet as well as buckles to finish the bracelet design.
In addition, you can find buckles sold in bulk separately.

If you’re planning on making a lot of different paracord bracelet designs, you can also invest in a jig kit that will make the process go much more quickly.


Making paracord bracelets
When you are first starting out making paracord bracelets, the learning curve can be steep. Reading carefully through this and other guides and watching videos on the process can make the task go easier at first. In addition, be sure to buy an excessive amount of paracord for your first project, since it is highly possible that you will run into problems and wish you had more cord to work with. Also, remember that the finishing knot or buckle is one of the most important parts of the bracelet since it will determine how comfortable it is to wear and whether your weave will hold up over time. Be patient when making your first paracord bracelet, and the results will follow.
Dragon’s Teeth Weave
The first weave, the Dragon’s Teeth weave, is a wide paracord bracelet weave that is straightforward and perfect for beginners. It requires two different cords, typically of different colors for style.
To start, fold one of your cords in half to form a loop on one end, then push that loop through the buckle. The amount of loop extending through the buckle will ultimately be the length of your bracelet, which should be about half to one inch greater in diameter than your wrist. Then take the right side of the cord and bring it under and out of the loop, then push it upwards from under the buckle. Push the cord down through the resulting small loop and tighten it. Repeat the same maneuver on the left cord, then flip the bracelet 180° and bring the right cord down and then up through the loop. Bring the cord around and push it up from under the buckle and through the resulting small loop. Tighten it, and repeat on the left side to finish the buckle attachment.
The weave itself starts by pushing the second cord under-over-over-under the four strands of the first core. Then make a loop with the right strand of this cord in the middle and do the same for the left strand. Pull the strand under three of the first cord strands and over the last one, then back over the two middle strands and under the first one. Repeat this until you reach the point of finishing the bracelet.
To finish it off, take one outer strand from the second cord and wrap it twice around the first cord’s strands. Pull it down under the last two weaves and cinch the whole thing down, then cut the loose end and melt it with a lighter. Finally, cut the remaining end of the second strand and melt it with a lighter.
Step by Step Instructions (follow the link to Instructables)
Video Instructions Below:
Fish Tail Weave
The Fish Tail weave is clean-looking and stylish, as well as relatively easy with some practice. You’ll typically want about eight feet of a single cord of paracord for this weave.
To start it off on the buckle, fold the cord in half and push the loop through the buckle. Then pull the loop over the buckle. Before cinching down the hitch push the loose ends of the cord through the other side of the buckle and through the center of the hitch – then tighten it. Thread in the other buckle in the same way and fit it over your wrist to get an idea of how much cord you’ll need in between the two buckle halves to make it fit.
At this point, you’ll have two pieces of cord connecting the buckles in the center and two strands with ends coming out of the second buckle half on either side. Take the leftmost cord and pull it over the second and under the third strands. When you have that tight, weave the rightmost cord over the third strand and under the second strand. Repeat this process, making sure to keep the weave tight as you move along the bracelet.
Step by Step Instructions (follow the link to Instructables)
Monster Cobra / Tri-Color Solomon
The Monster Cobra (or Tri-Color Solomon) weave is a little more involved since it uses three individual pieces of paracord rather than one or two, but it is still not difficult with practice and patience. Because of the three strands, the result will be a wide paracord bracelet compared to other weaves. Using different colors can help you keep track of your weave while you are learning.
To start attach two of the cords to your buckles by simply forming two hitches. For each cord, find the center and then loop it through the buckle, then pull that loop over the buckle and tighten it down.
To begin the weave, loop the third cord around the inner two strands (one from each of the first two cords). Pass the right strand of that cord and the rightmost strand of the first two cords under the leftmost strand and left strand of the third cord. Do the same for the left strand of the third cord and the leftmost strand of the first two cords, going over the rightmost strand. Repeat this crossover pattern down to the end of the bracelet.
To finish it, simply cut the loose ends of the strands after the last weave is tightened down and use a lighter to burn the cut ends of the paracord.
Step by Step Instructions (follow the link to Instructables)
Trilobite
The trilobite is a stylish weave that can be done in two colors since it uses two different cords. You’ll need a stable work area for this weave, though, since it requires hanging the cords off a nail or other hanger while working. The weave itself is an intricate braid and is not necessarily great for beginners.
To start, loop the two cords and hitch them through one half of the buckle as for many of the other paracord bracelet weaves. Once the buckle is fastened on, loop the two cords around the nail, the bottom one held out to the right and the top one held to the left. Then pass the rightmost strand over the two middle strands and under the leftmost strand, and pass the leftmost strand under the middle two strands and over the rightmost strand. For each of those strands you passed, loop them once around the leftmost and rightmost strands respectively. Repeat this weave until you reach the desired length.
When you are ready to close off the weave, you’ll have two loops at the top end where the cords were handing on the nail, and two strands coming off the bottom of the bracelet. Simply pull down on those two bottom strands, and the loops will tighten and disappear. Attach the other buckle via hitches to each of the strands, then cut and burn the remaining loose ends to finish the bracelet off.
Step by Step Instructions (follow the link to Instructables)
Boa
The boa is a wide paracord bracelet weave that can be difficult without a paracord jig. The weave uses two cords, so a two-color design is possible.
Start off by hitching both strands to one half of the buckle, but hitch them together rather than individually. When this is done, there should be two strands rather than four coming off of the buckle.
Cross the end of one strand over the top of both strands. Then cross the end of the other strand over top of that and under the two strands extending from the buckle, and loop it around the first end’s strand on the far side. Continue working with that end and loop it as you did the first, over the two center strands and under the strand on the opposite side. At the end of each weave, you will end with both ends of paracord on the same side of the bracelet. Repeat this pattern until you reach the desired bracelet length.
When you get to the end, hitch the four strands to the other half of the buckle as you normally would, by forming two loops. Because the hitches on either half of the buckle are different, expect the weave to look slightly different around the buckle. Cut the remaining cord and burn the ends to finish the bracelet.
Step by Step Instructions (follow the link to Instructables)
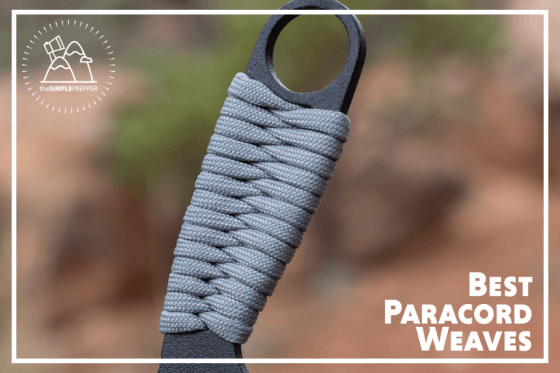
Paracord Wrap
Rather than restrict your weaving to bracelets, you can also put your paracord supplies towards tactical paracord projects like wrapping the handle of an axe or other tool in paracord. This leaves you with much more continuous cord to work with when you break the weave in case of emergency.
Start at the top end of whatever handle you’ll be wrapping. To begin the wrap, simply find the middle of your cord (be sure to start with more cord than you think you’ll need – it’s easier to cut off later than to run out) and loop the middle around your starting point on the handle. Pull one strand up the handle and the other down the handle, then twist so that the strands are now looped around each other and are on opposite sides of the handle to how they started. Make another loop around the handle and repeat the process until you reach the bottom. Maintaining consistent tightness and keeping meticulous track of which strand is which is important for getting a consistent wrap during this weave, which will translate to comfort and ease of unraveling later. If you need to take a break, use a clamp to keep tension on the cord while you step away.
To finish off the wrap, a simple square knot will suffice. However, for added stability, if your handle has an eyehole near the bottom, you can push the cord through the hole and tie off against that. In either case, cut off the excess cord when you are finished and burn the ends to prevent the nylon from sloughing.
Step by Step Instructions (follow the link to Instructables)
Tangle-Free Storage
Sometimes you just need to have a lot of paracord with you, and you want to be able to access it easily when the time comes – not deal with knots. To make matters more complicated, you don’t always know how much cord you’ll need for a specific application, so you need a system that can “dispense” cord without forcing you to redo your whole weave. This is where the storage weave comes in handy – it keeps your paracord nice and knot-free, but comes undone easily with a few tugs or can let out only as much cord as you would like before closing it off again.
Start off by making six loops in the paracord. The size of these loops will depend on how much cord you are trying to store, but wrapping the cord around your hand is a good guide of diameter. Once you have your loops, create a small loop at the point where your loops end and the excess cord begins. Wrap the excess cord around the six loops one time, then pull a small bit of the excess through the small loop you made and tighten it down to create a cinched-off loop.
Repeat this process, creating another small loop from your excess cord that is then pulled through your existing loop and cinched off. As you go, the loops will move around the circle and may eventually reach back to where you began, in which case you will just work on top of your original weave. At the end, your last loop will be left sticking out, ready to be pulled on to unravel the weave as much or as little as you need.
Step by Step Instructions (follow the link to Instructables)
The Verdict
Paracord is one of the most useful things you can carry into the backcountry in order to prepare for an emergency because it is so versatile and nearly unbreakable. But rather than pack loose paracord into your pack or emergency kit, winding it up into a bracelet that you can wear or a knot-free weave allows you to access your paracord quickly and easily when you need it. These 7 weaves are among the most useful ways to wrap your paracord so that you will always be ready to deal with an emergency.


0 Comments